Time of Day Routing

Time of Day Routing allows you to forward incoming calls to different destinations depending on the time, the day of the week, or specific dates.
It is different from our Business Hours feature as it controls the routing of calls as they arrive, instead of when a call is sent through to an extension or group.
Time of Day Routing is based on timetables. You create a timetable with a default destination for your calls, and then add time periods on each day of the week, or on specific dates, when you want your calls to go elsewhere. Once complete, the timetable becomes available as a possible destination for your Inbound Numbers.
Head over to the Time of Day Routing section of your Control Panel.
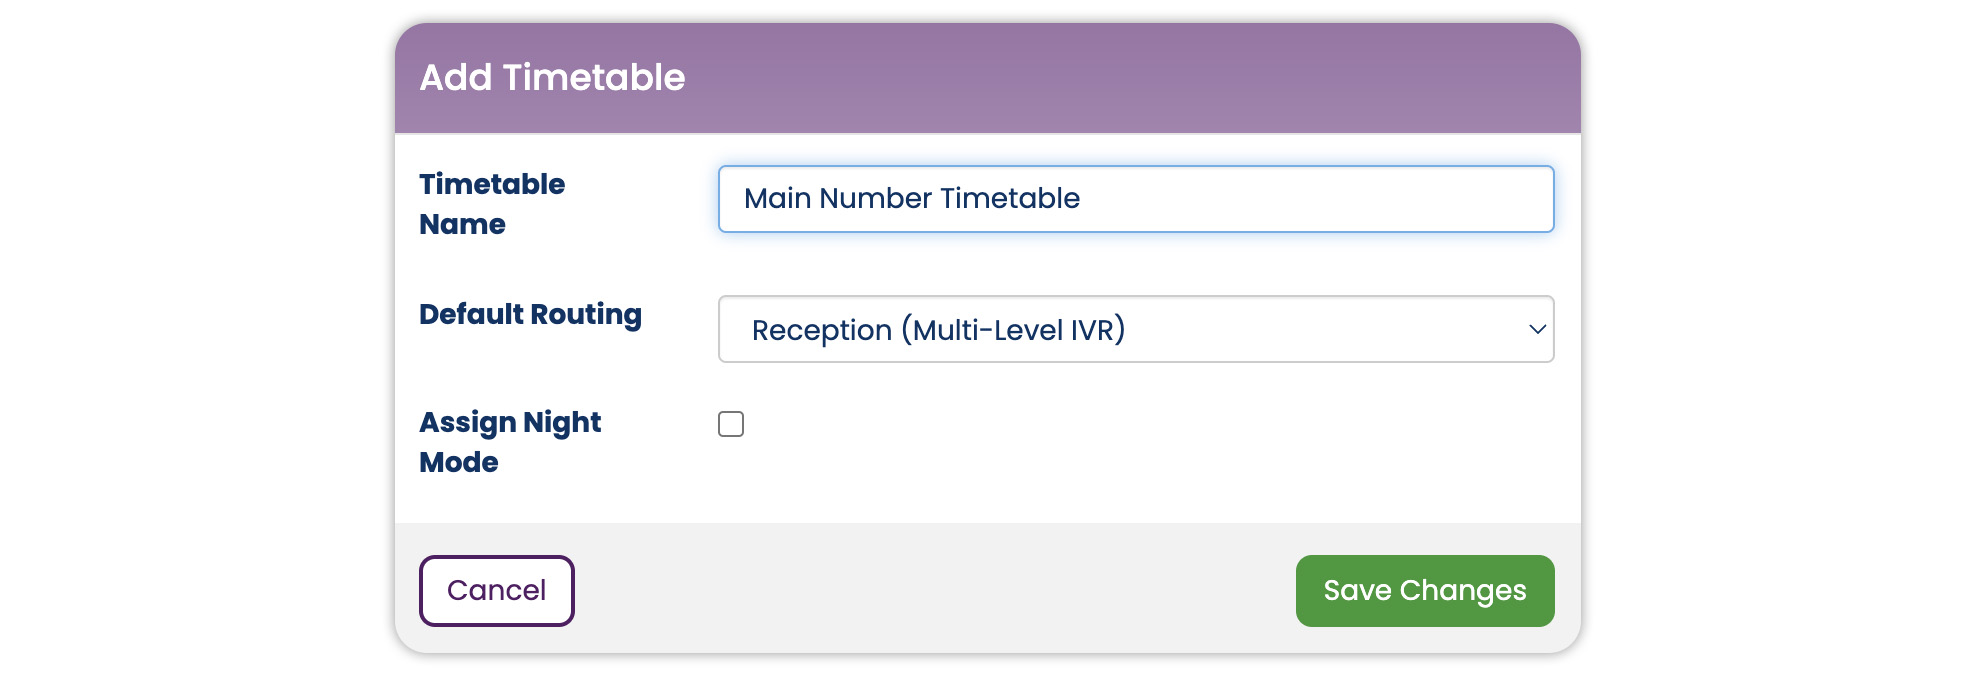
Click on the "Create your first timetable" button to get started. Give your timetable a name to help you remember whose phone number the timetable will be applied to. This name will be displayed in the Inbound Numbers routing selection. Now set the default route, which is the destination that calls will route to outside of any time periods you specify in the timetable itself. Press "Save" to move on to creating your custom routings for each day of the week.
Weekly timetable
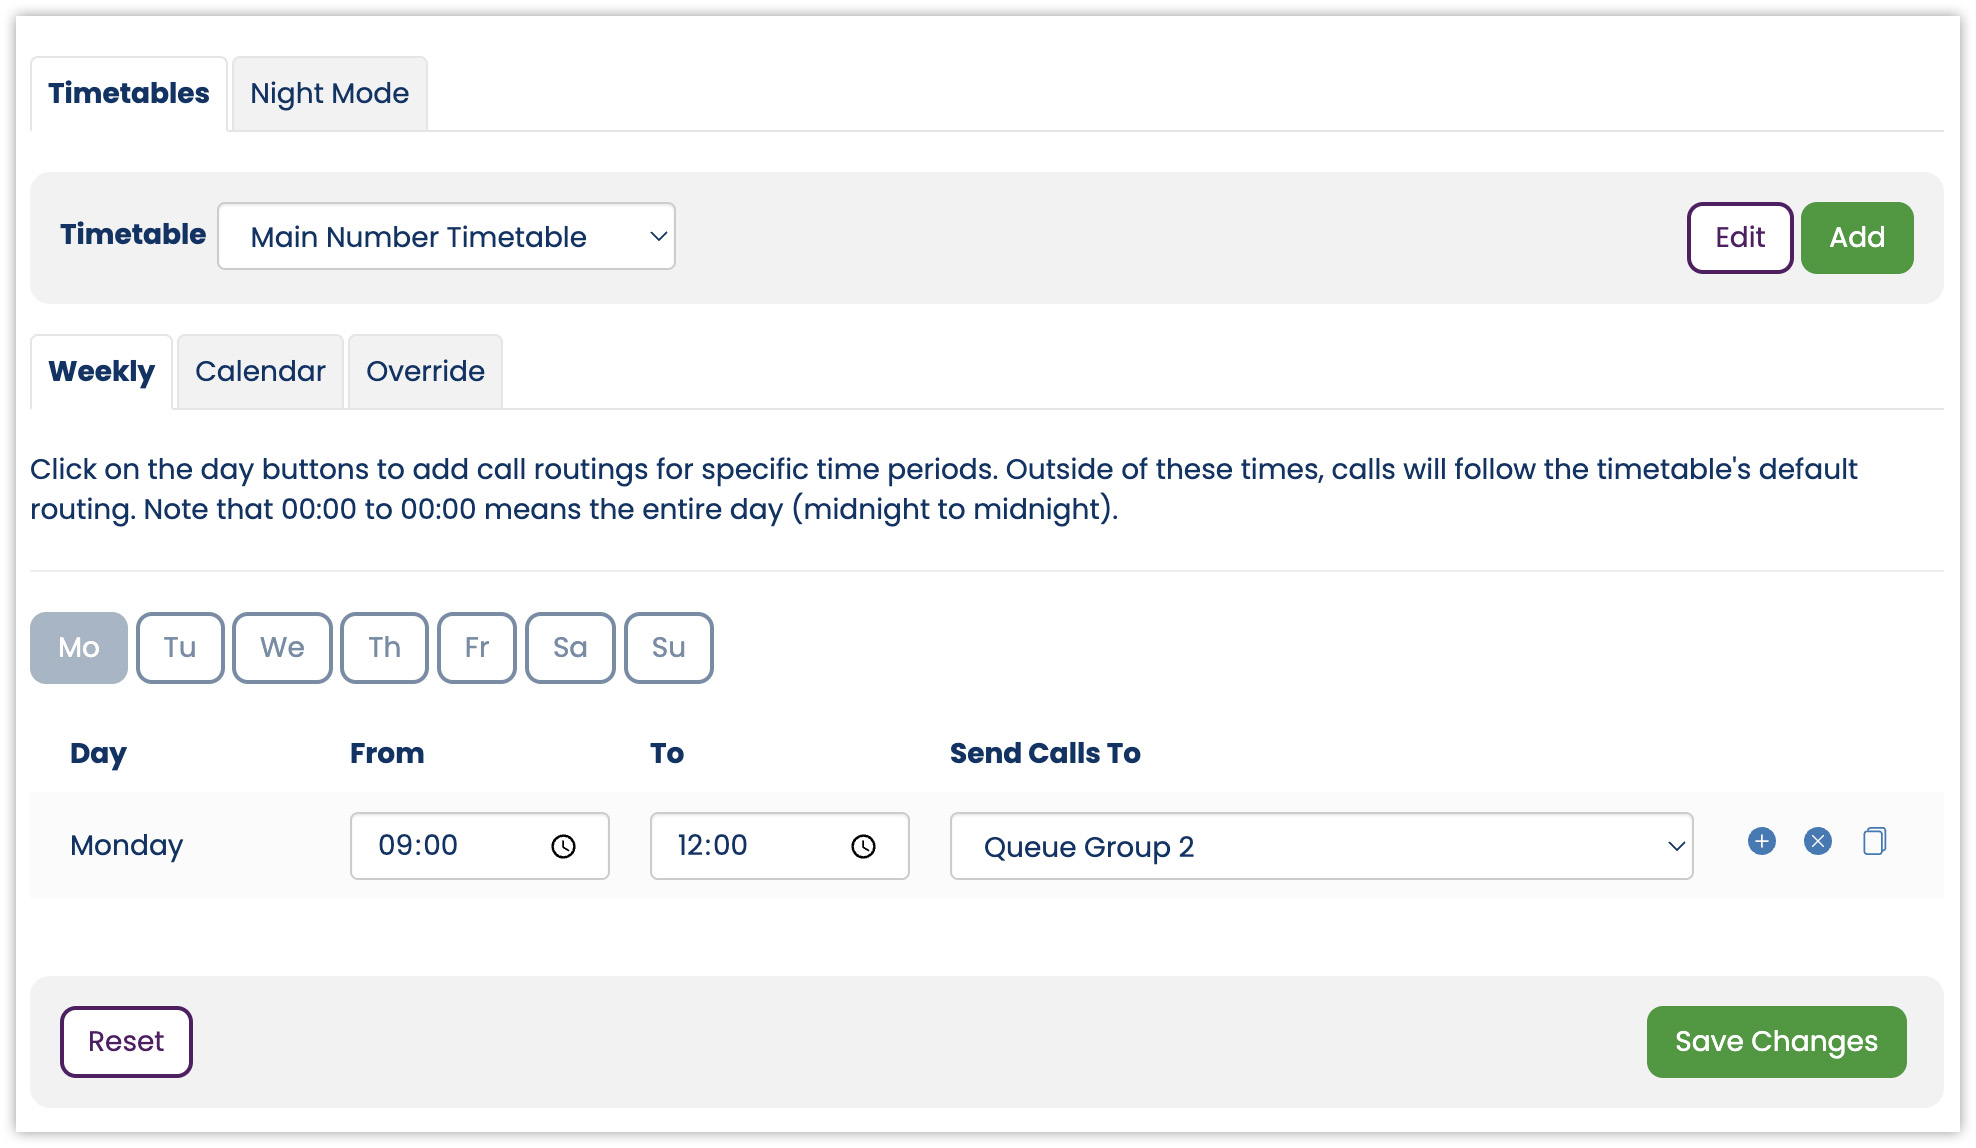
The Weekly tab allows you to specify call routings for each day of the week, that will repeat every week, unless overridden by the calendar, temporary override, or night mode settings.
Click on the day buttons to add call routings for that day. Enter a start time, end time and the destination that calls should go to during that period. Click the
icon to add another time period to that day, or
to remove it. Note that time periods cannot overlap. A time of 00:00 in the 'To' column means midnight at the end of that day.
You can copy all the time periods from one day to one or more other days by simply clicking the
icon. This will open a popup where you can choose the days you want to copy these settings to.
Calendar
The calendar tab allows you to set special call routing on specific dates such as Bank Holidays, or for a range of dates (for example if your company is closed for Christmas). On those days, anything defined under the Weekly call routing will be ignored.
Click the 'Add new date' button, and choose the start and end date for when you want your special call routing to apply.
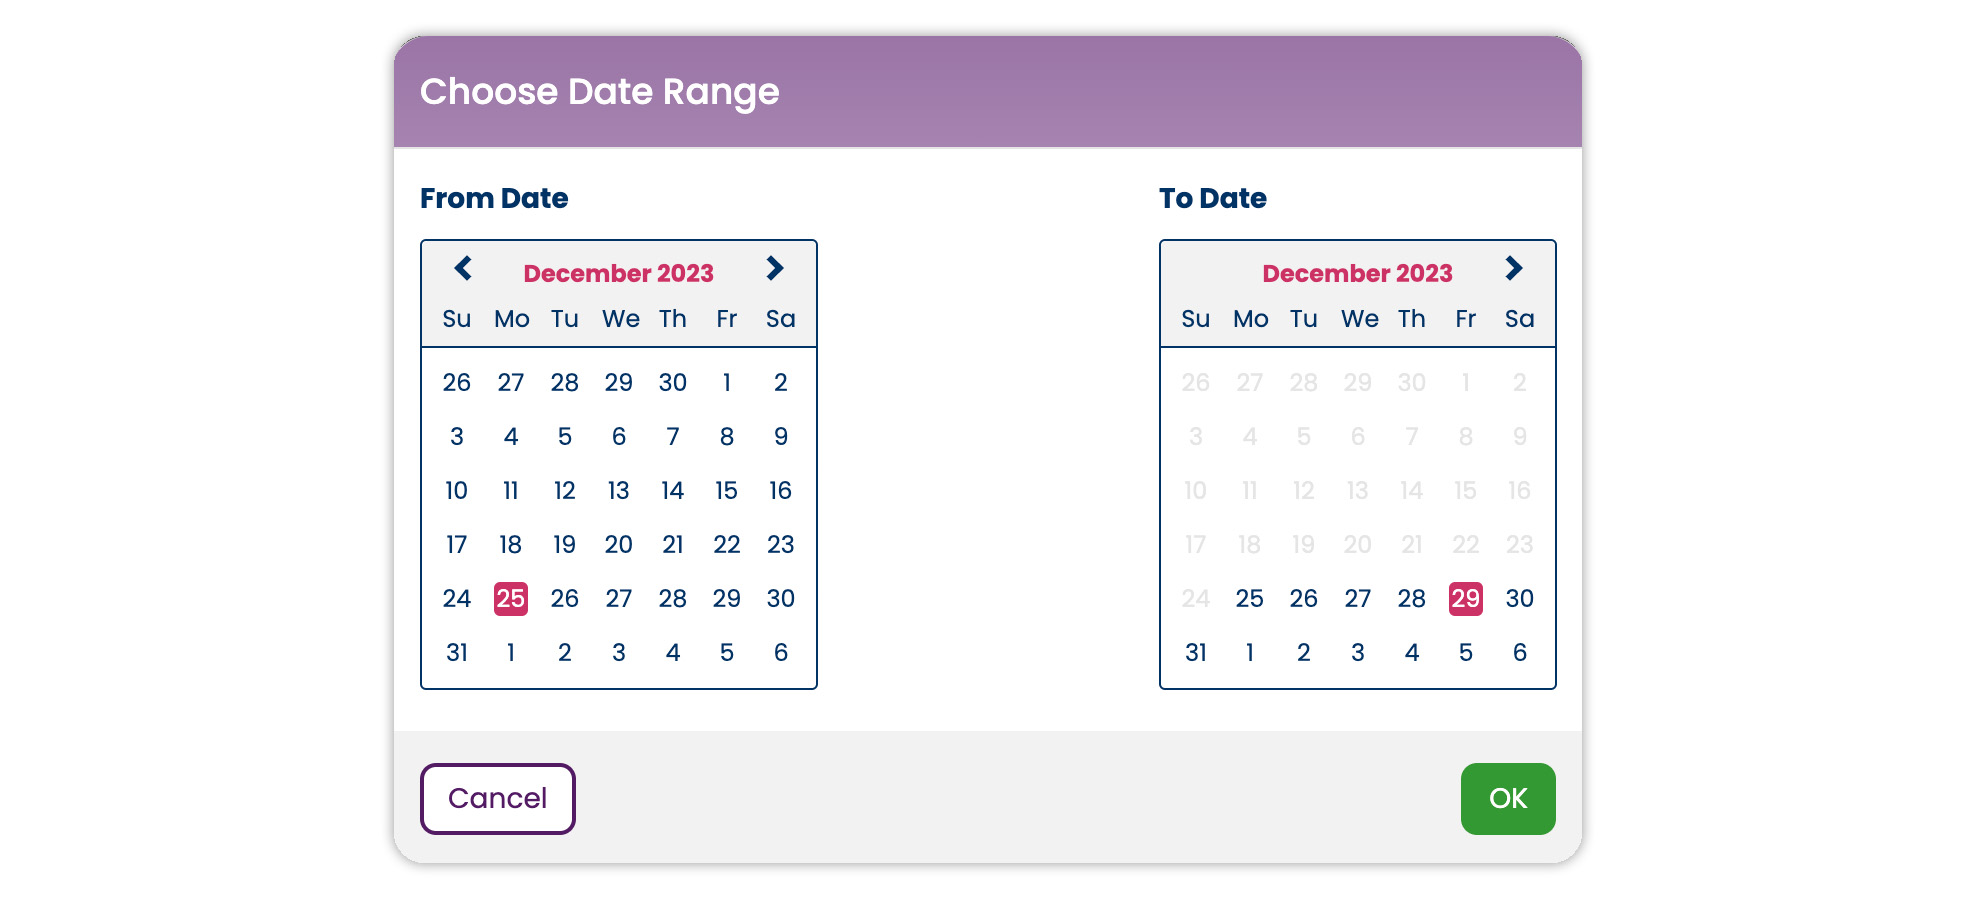
You can then add time periods for those days in the same way as you would for the Weekly settings. To add another date range, simply click the 'Add new date' button again.
Overrides
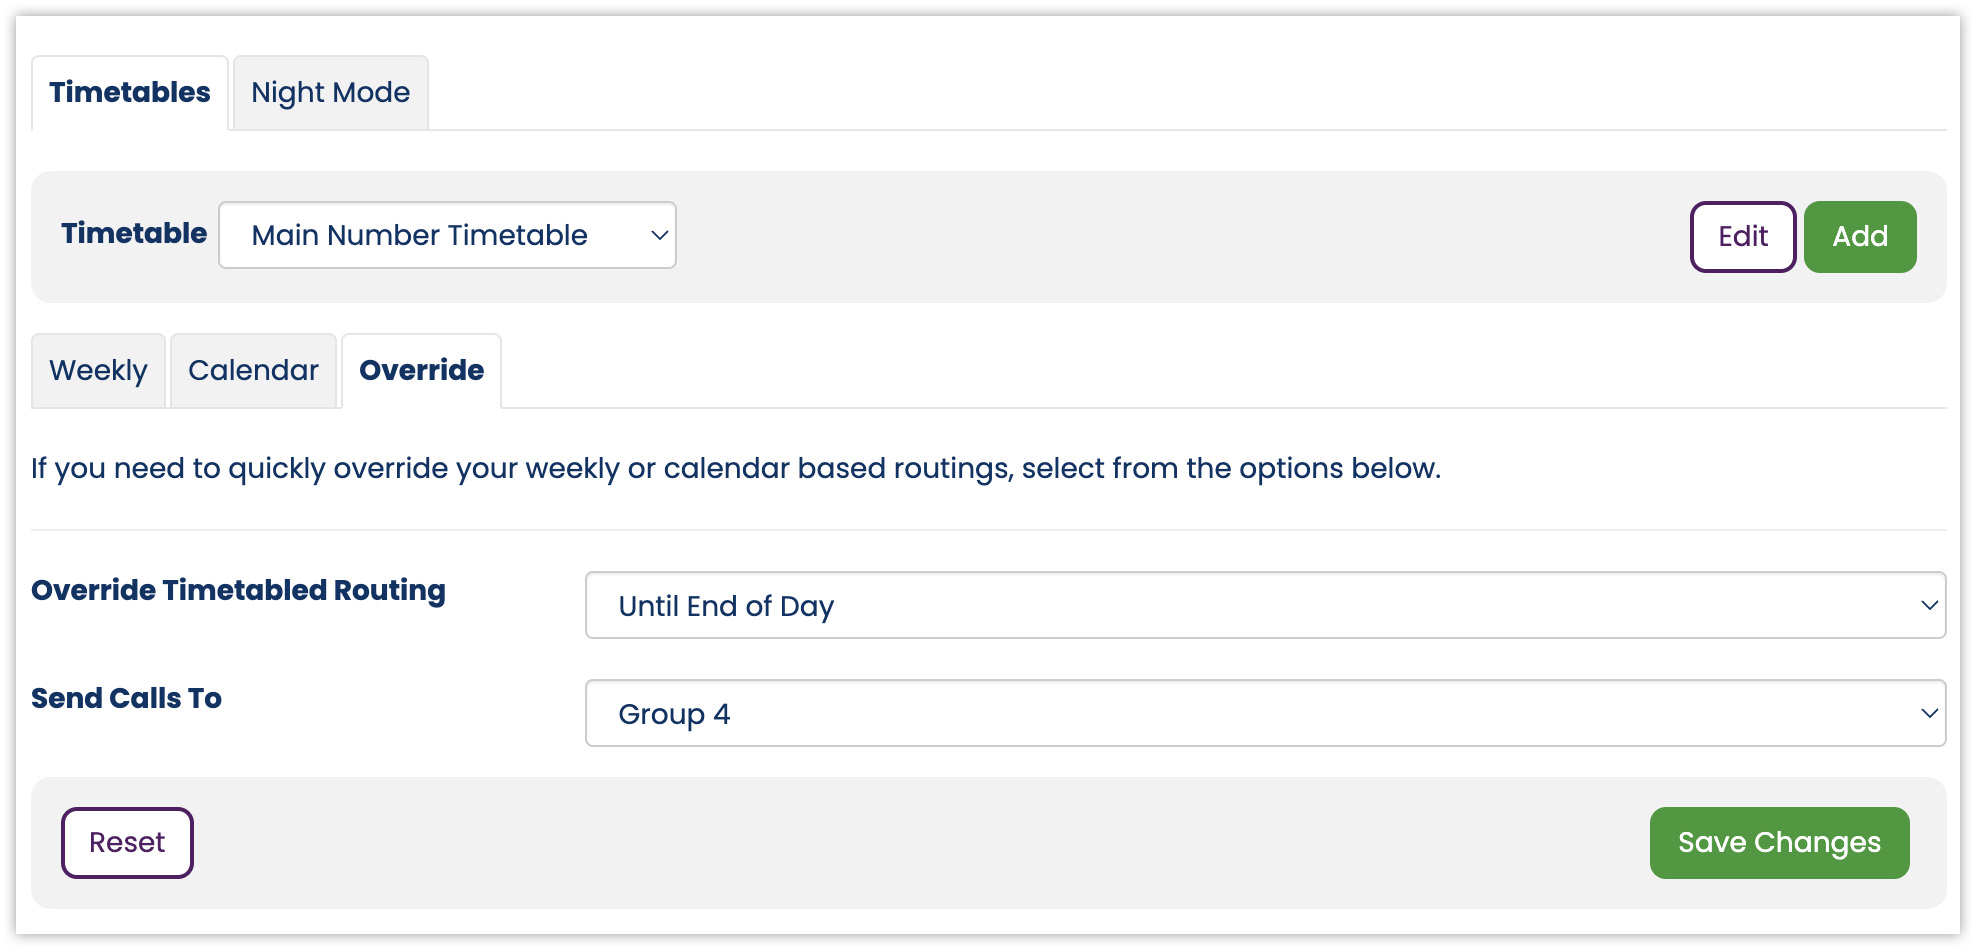
You can redirect your calls without disrupting your weekly hours or calendar settings by applying an override.
From the dropdown list, select the type of override you would like, and then choose where your calls should be routed while the override is active. The available overrides are:
- Until end of day - the override will be applied until midnight tonight. After midnight, the system will revert to the weekly and calendar settings as normal.
- Until end of date - When this option is selected you then choose a date. The override will be applied until midnight at the end of that day.
- Until further notice - the override will be applied until you change the setting back to 'No overrides'
Using your timetable
Navigate to the Inbound Numbers page in your Control Panel. Find the number you want to use your timetable with, and select the timetable from the Routing dropdown list.
Calls to that number will now follow your timetabled routes during the times you have specified, and the timetable's default routing outside of those times.
Night Mode
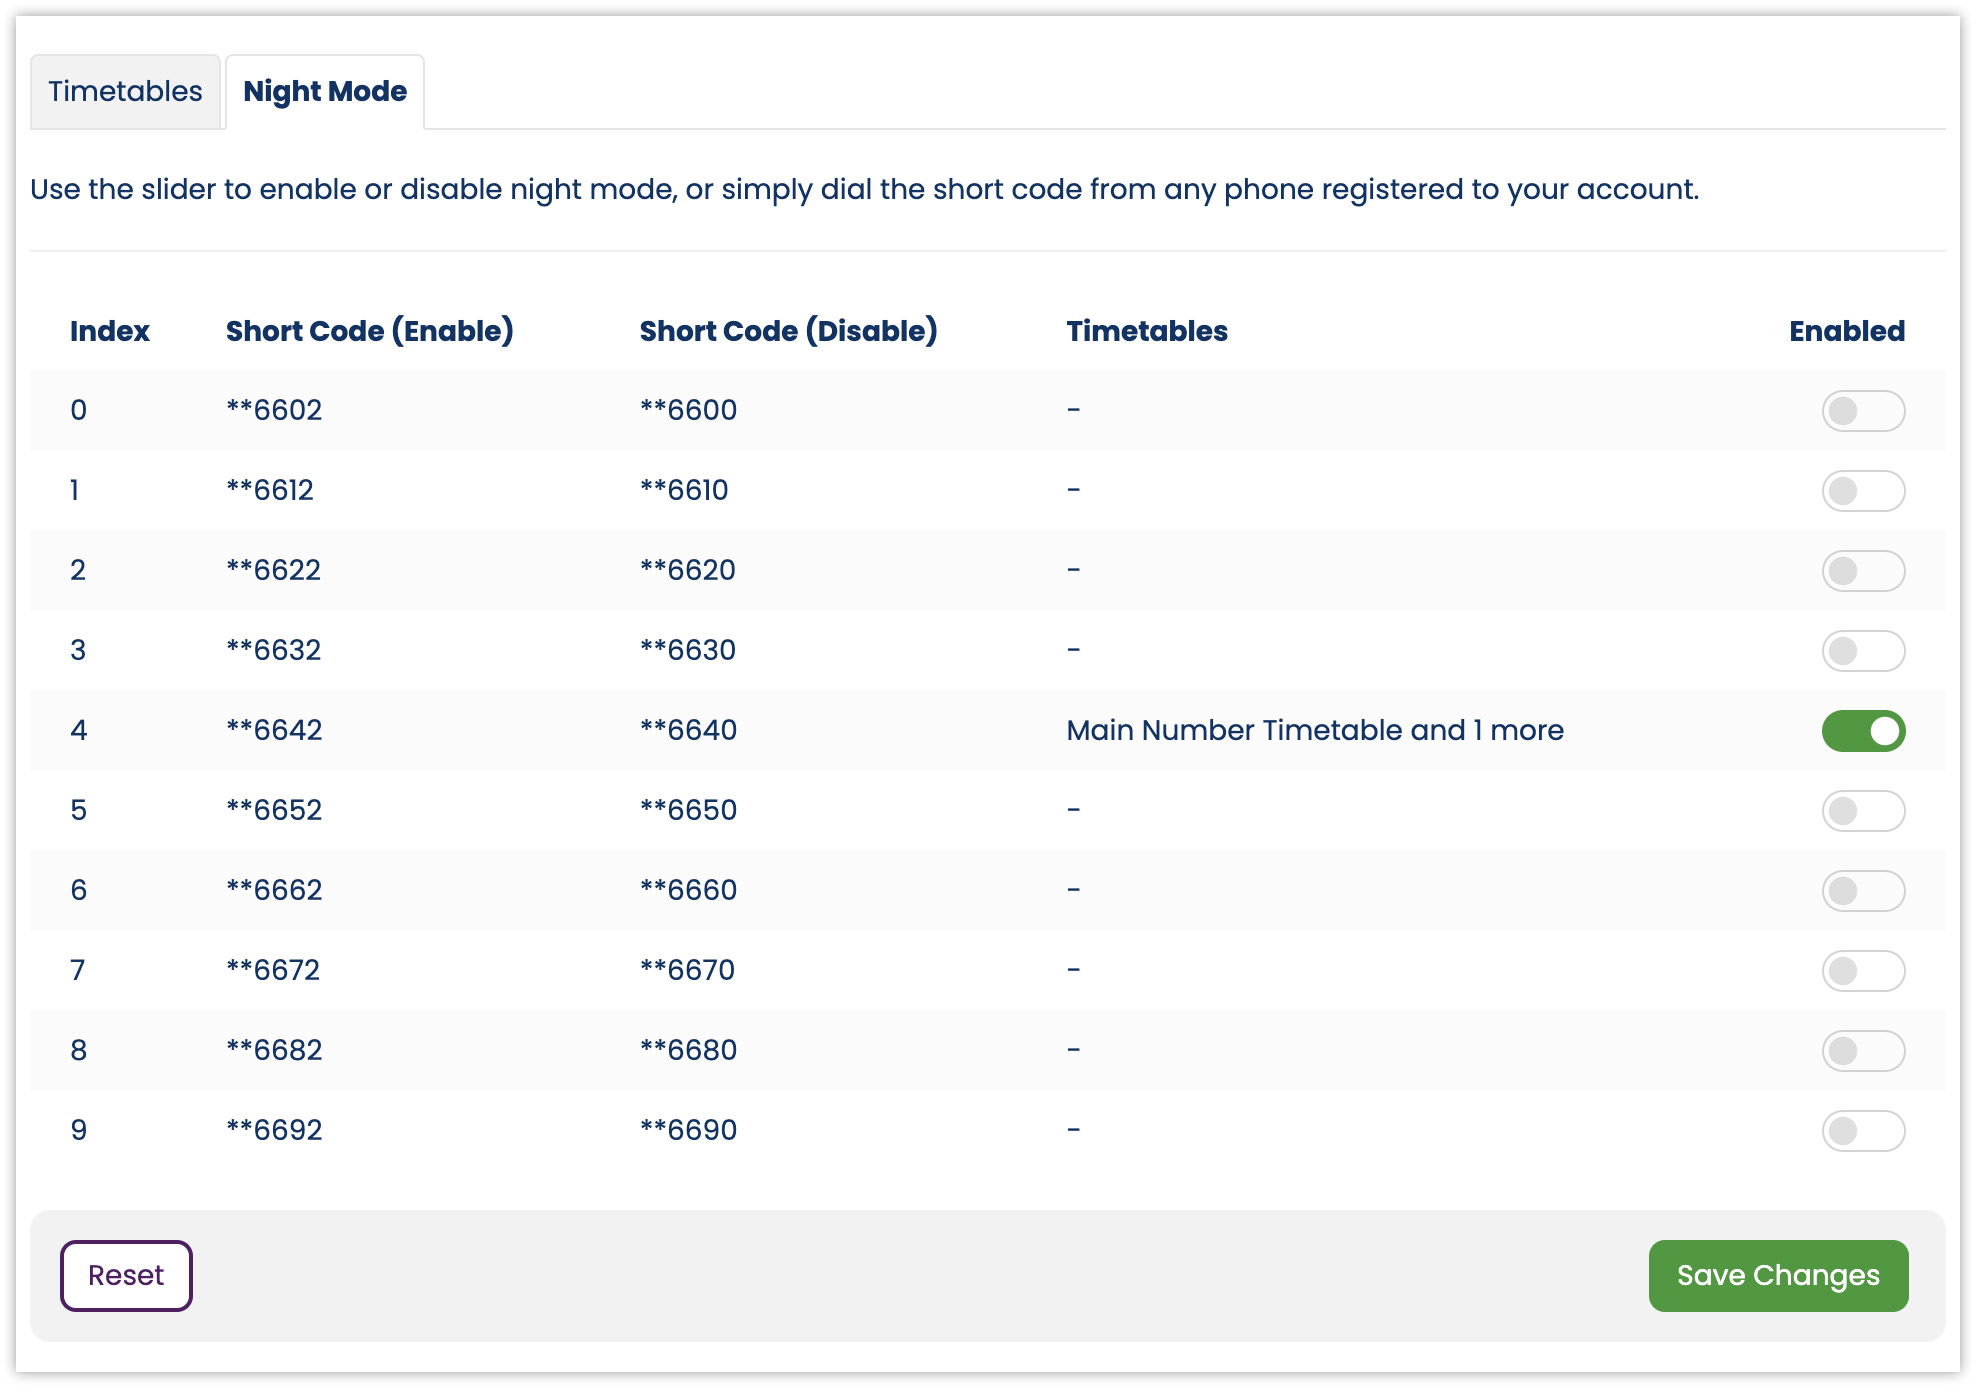
Night Mode is a special override that can be triggered on multiple timetables at the same time. When enabled, incoming calls go to the destination set in the timetable's 'Night Mode Routing'. This takes priority over any other timetable settings, and can also be enabled and disabled by dialling a special short code from any of your extensions.
Click the 'Edit' button and on the popup tick the 'Assign Night Mode' checkbox. Next you need to specify which Night Mode Index this timetable should be assigned to. There are ten night mode indexes available (0-9), which allows you to have separate night modes for different parts of your company. The index you choose will form part of the short code that can be dialled to enable or disable night mode.
Once you have chosen your index, you must also select where to send calls when the night mode is active.
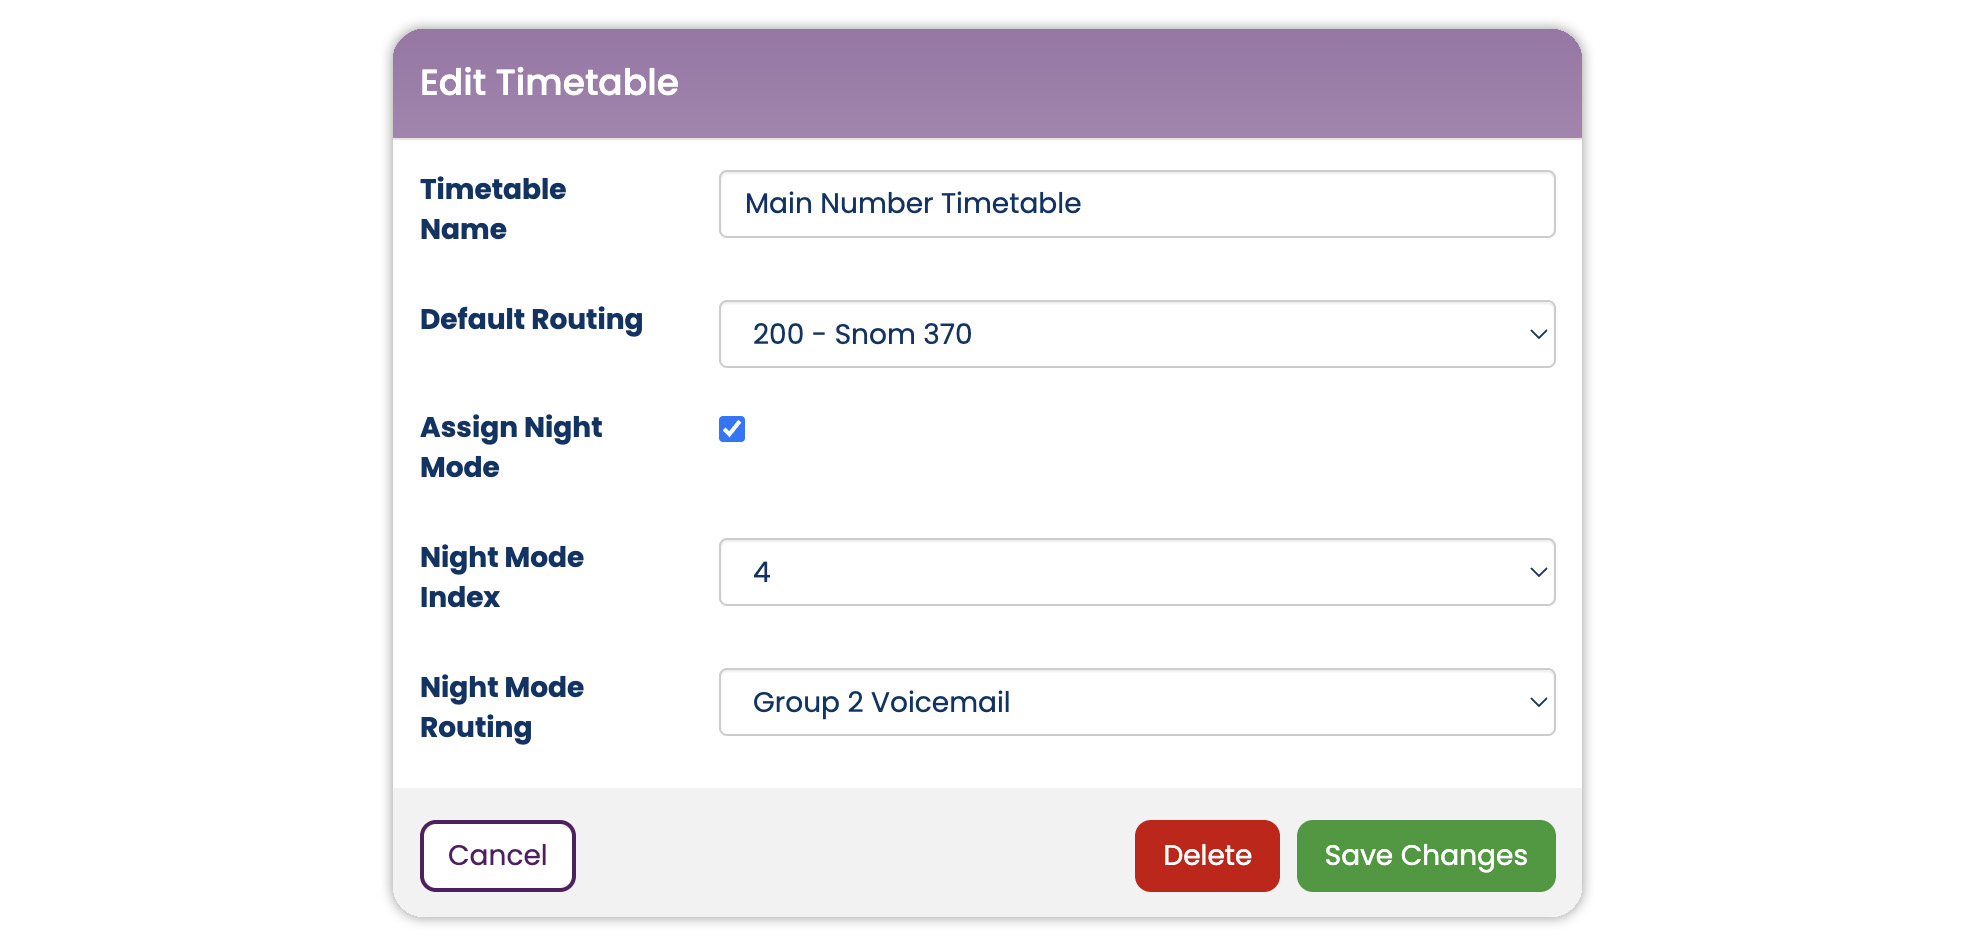
To activate night mode, either click the relevant slider under the night mode tab, and press 'Save Changes', or dial the short code listed. In the example used here, the 'Main Number Timetable' has been associated with Night Mode 4. Dialling **6642 from your phone will enable Night Mode 4 and calls to inbound numbers using the 'Main Number Timetable' will be routed to the voicemail box of Group 2. Dialling **6640 will turn off Night Mode 4 and calls be will routed according to the timetable settings again.
